
 James
James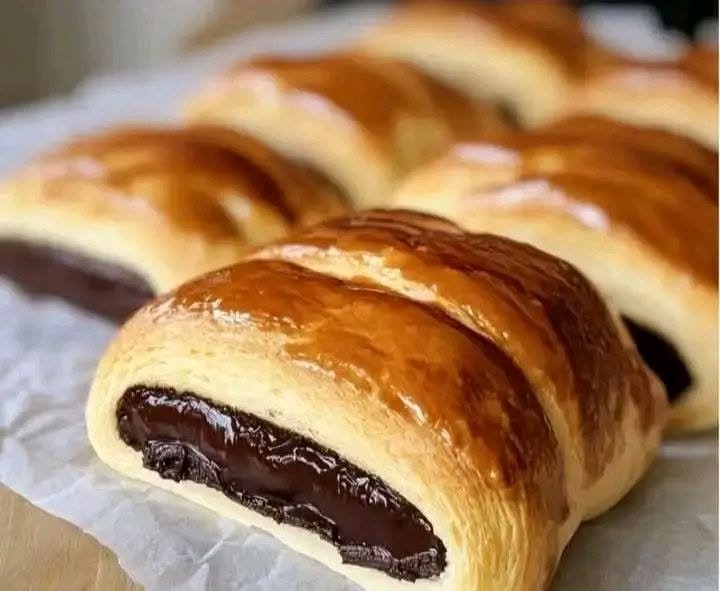
Homemade Pain au Chocolat, often known as a chocolate-filled French pastry, offers a wonderful blend of buttery layers and rich chocolate wrapped within delicate laminated dough. The process takes patience and care, yet the reward makes every step worthwhile. Fresh from the oven, each pastry displays golden flaky layers surrounding smooth chocolate that melts gently with every bite.
What Makes Pain au Chocolat Special?
Pain au Chocolat belongs to the family of laminated pastries. The dough contains many thin layers created by folding butter into dough repeatedly. During baking, moisture within the butter turns into steam, helping separate the layers and create the characteristic flaky texture.
Unlike a traditional croissant shape, Pain au Chocolat is formed into neat rectangular parcels with chocolate enclosed in the center. The result is elegant, rich, and perfect for breakfast, brunch, afternoon tea, or dessert.
Preparation Time
- Dough preparation: 45 minutes
- Chilling and resting: 10–14 hours
- Shaping: 30 minutes
- Final proofing: 2–3 hours
- Baking: 18–22 minutes
- Total project time: Approximately 14–18 hours
Ingredients
For the Dough
- 500 g bread flour
- 60 g granulated sugar
- 10 g salt
- 10 g instant yeast
- 300 ml cold whole milk
- 50 g unsalted butter, softened
For the Butter Block
- 280 g unsalted butter
For Filling
- 16–20 dark chocolate batons or sticks
- Alternatively, high-quality dark chocolate bars cut into thick strips
For Egg Wash
- 1 large egg
- 1 tablespoon milk
Equipment
- Rolling pin
- Measuring scale
- Plastic wrap
- Baking trays
- Parchment paper
- Pastry brush
- Sharp knife or pizza cutter
Step 1: Prepare the Dough
Place bread flour into a large mixing bowl.
Add sugar, salt, and yeast. Keep salt and yeast separated at first before mixing thoroughly.
Pour cold milk into the bowl.
Add softened butter.
Mix until a rough dough forms.
Transfer onto a work surface and knead until smooth and elastic. The dough should feel soft yet firm enough to hold shape.
Shape into a rectangle.
Wrap securely and place into the refrigerator for at least 2 hours, though overnight chilling produces excellent results.
Step 2: Prepare the Butter Block
Place butter between two sheets of parchment paper.
Using a rolling pin, gently pound and roll butter into a rectangle measuring roughly 18 x 20 cm.
Aim for an even thickness throughout.
Place the butter rectangle into the refrigerator.
The butter should remain cold yet flexible. Hard butter may crack during rolling, while overly soft butter may leak into the dough.
Step 3: Enclose the Butter
Remove chilled dough.
Roll dough into a rectangle approximately twice the size of the butter block.
Position butter at the center.
Fold dough over butter from both sides, enclosing it completely.
Seal edges carefully.
At this stage, the butter should remain fully enclosed within the dough.
Step 4: First Fold
Place dough on a lightly floured surface.
Roll gently into a long rectangle.
Keep edges as straight as possible.
Fold the lower third upward.
Fold the upper third downward, creating a letter-style fold.
This creates the first layer-building fold.
Wrap dough and refrigerate for 45–60 minutes.
Step 5: Second Fold
Rotate dough 90 degrees.
Roll once again into a long rectangle.
Repeat the same letter fold.
The dough should become smoother and more structured.
Wrap and chill for another 45–60 minutes.
Step 6: Third Fold
Roll dough carefully.
Complete another letter fold.
By now, numerous thin layers exist within the dough.
Wrap securely.
Chill for at least 2 hours or overnight.
Long resting periods improve flavor and help maintain clean layers.
Step 7: Roll for Shaping
Place chilled dough onto a lightly floured surface.
Roll into a large rectangle roughly 4–5 mm thick.
Trim edges neatly.
Measure and cut rectangles approximately 8 x 12 cm.
Uniform pieces ensure even baking.
Step 8: Add Chocolate
Lay one rectangle on the work surface.
Place one chocolate baton near one short edge.
Roll dough over the chocolate.
Place a second baton near the folded section.
Continue rolling until a compact parcel forms.
Position seam-side down.
Repeat with remaining dough pieces.
Step 9: Arrange on Baking Trays
Line baking trays with parchment paper.
Leave generous spacing between pastries.
The dough will expand considerably during proofing and baking.
Arrange neatly in rows.
Step 10: Final Proof
Cover trays loosely.
Allow pastries to rise in a cool room for approximately 2–3 hours.
They should appear noticeably puffed and light.
Proper proofing contributes greatly to a tender interior and beautiful layers.
Avoid warm environments that may melt the butter.
Step 11: Apply Egg Wash
Whisk egg and milk together.
Brush gently over each pastry.
Apply an even coating.
The egg wash encourages deep golden color and attractive shine.
Step 12: Bake
Preheat oven to 200°C (400°F).
Place trays into the oven.
Bake for 18–22 minutes.
Watch as layers expand and become beautifully golden.
The aroma of butter and chocolate will fill the kitchen.
Remove from oven once deep golden brown.
Allow pastries to cool slightly before serving.
Signs of Perfect Pain au Chocolat
- Deep golden surface
- Crisp flaky exterior
- Distinct visible layers
- Light airy interior
- Rich buttery aroma
- Smooth melted chocolate center
Helpful Tips
Use Quality Butter
European-style butter with higher fat content often produces superior layers and flavor.
Keep Everything Cold
Cold dough and cold butter remain essential throughout lamination.
Should the dough become too warm, return it to the refrigerator before continuing.
Avoid Excess Flour
Use only enough flour to prevent sticking.
Too much flour may toughen the dough.
Roll Evenly
Maintain consistent thickness during every rolling stage.
Uneven thickness may create irregular layers.
Be Patient
Excellent laminated pastry rewards patience.
Rushing often leads to butter leakage or poor layer development.
Flavor Variations
Extra Dark Chocolate
Use intense dark chocolate for a bold flavor profile.
Milk Chocolate Version
Choose creamy milk chocolate for a sweeter pastry.
Orange Chocolate
Add a touch of orange zest to the dough.
Hazelnut Chocolate
Spread a thin layer of hazelnut filling before rolling.
Almond Chocolate
Add finely chopped toasted almonds alongside the chocolate.
Serving Suggestions
Pain au Chocolat pairs wonderfully with:
- Fresh coffee
- Hot chocolate
- Tea
- Warm milk
- Fresh berries
- Citrus fruit salad
- Vanilla cream
Serve slightly warm for maximum enjoyment.
Storage
Store cooled pastries within an airtight container for up to 2 days.
For longer storage, freeze after baking.
Reheat in a moderately warm oven for several minutes to restore crispness.
Final Thoughts
Homemade Pain au Chocolat represents one of the most rewarding pastry projects for home bakers. Layer upon layer of buttery dough surrounds rich chocolate, creating a bakery-quality treat that feels luxurious and memorable. Though the process spans many hours, most of that time consists of resting and chilling. Careful rolling, proper folding, and attention to temperature produce pastries with remarkable flakiness, beautiful structure, and exceptional flavor. Freshly baked Pain au Chocolat served warm alongside a favorite beverage delivers a classic French pastry experience that rivals many professional bakeries.